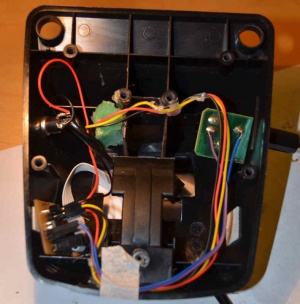
Digital FD-8 pedal
From Just in Time
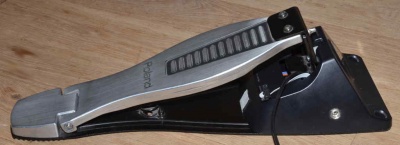
Both editors of the Justintime pages have a Roland TD-3 electronic drum kit. This kit plays quite nicely, but after some years the responsiveness of the hi-hat pedal deteriorates. We are not the only ones who have noticed this; google for 'roland fd-8 issues' to find widespread complaints and hacks/solutions people have come up with. Most solutions try to fix the problem by adjusting the mechanical pressure on the variable film resistor in the pedal.
In Roland FD-8 Issues: Hall Sensor Modification we described how a ratiometric hall sensor could replace the resistor film to repair Roland FD-8 hi-hat pedals. That Hall Sensor implementation works fine. However, a microcontroller-based approach provides some additional advantages:
- potentially adjustable sensitivity curve;
- more than 3 resistor levels, allowing detection of velocity;
- auto-calibration, i.e. no need for pots to set the trigger points.
Operation
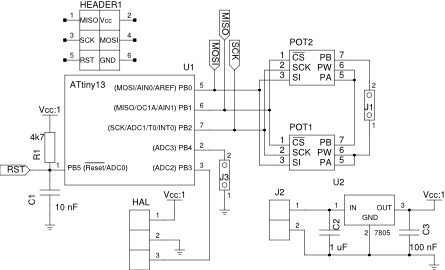
The principle behind the digital FD8 pedal is quite simple: a hall effect sensor measures the proximity of a magnet attached to the pedal. An attiny13 reads the sensor values using its ADC and determines the pedal position from that. Finally, the attiny sets a digital variable resistor to a value that represents the pedal position.
Electronics
The schematics (in gEDA format) are part of the GitHub repository.
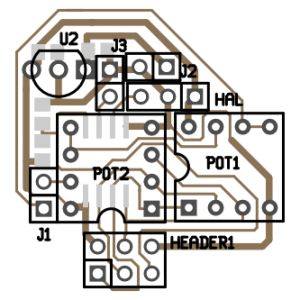
The microcontroller-based version offers 256 different pedal positions at a BOM cost that is still much lower than $10. The components used are:
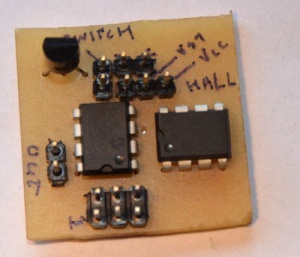
- One SMT attiny13 MCU (ebay, datasheet), an 8-pin AVR with effectively 5 io pins and 10-bit ADC;
- Two MCP41010 digital potentiometers (ebay, datasheet) in series to emulate the film resistor in the FD-8. We need a range of approximately 0-20K and while the 10K MCP41010 is readily available on ebay, we had trouble finding a cost-effective 20K or 50K digital pot. Hence the two pots in series;
- One Honeywell SS490 ratiometric hall effect sensor as in the non-MCU version, or alternatively an Allegro A1302 (Just ordered a pair on ebay). The latter should be comparable to the Honeywell if used in a 5V setup, but this hasn't been tested yet;
- Any old 78L05 that we can get our hands on;
- an SMT resistor and several SMT capacitors.
Pin PB4 is currently not used, but is connected to a header on the print, so that a (momentary) switch could be connected. The idea is that currently the pedal will have to calibrate every time it switches on (determining the range of the pedal), but it would be possible to write the calibrated values to eeprom. The switch can then be used to trigger a reset of the calibrated values. Alternatively, the switch could be used to set set the 'half-closed' point of the pedal.
Because this is a prototype, there is still a 6-pin header on the PCB to reflash firmware. The PCB is designed in such a way that the header can be removed (sawn off) without re-routing. If at some point a single potmeter version would be feasible (using for instance an MCP41050), the second potmeter can also be removed with minimal re-routing. This would result in a much smaller PCB.
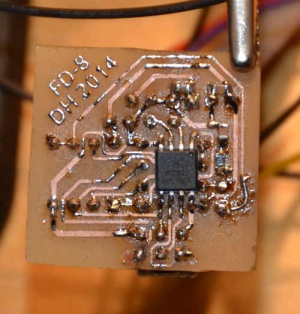
An svg-file of the PCB traces that is ready for toner transfer can be found here.
Build
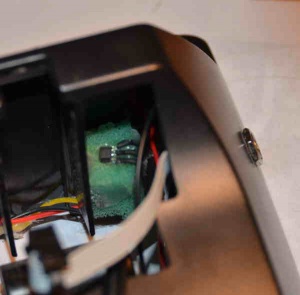
Mechanically, the build is very similar to the comparator-based one. This time around the PCB is somewhat bigger and the leads to the sensor were a bit longer, making it harder to cleanly place everything inside the enclosure. Some hot glue helped in keeping the wires out of the way while assembling the pedal. Because I wasn't so sure about the correct height for the sensor, I just glued it to a sponge and glued the sponge into the housing. This avoids damaging the sensor with an over-enthousiastic stomp.
Just as with the comparator based version, the electronics need their own power supply and for that purpose a socket was added to the pedal housing. Power to the drum computer is then provided through a cable running from the pedal.
Software
The software for this device is available on GitHub. The complete algorithm is in this source file.
Basic operation and auto calibration
The basic mode of operation is as follows:
- Measure the output voltage of the hall sensor using the ADC.
- Determine a corresponding resistance and program that resistance value in the digital pots.
- Repeat
There are two complexities that the firmware resolves as it performs the above two steps:
- Range. Depending on the strength of the magnet and its distance from the sensor, the Hall effect sensor will report only a limited range of values that don't span the complete possible range. The firmware will detect the minimum and maximum values and use those to map that range to the full range of 0—255 that should be given to the potentiometer;
- Polarity. Ratiometric Hall effect sensors typically output a voltage of ½ Vcc if no magnetic field is sensed. As soon as a magnet approaches the voltage will either go up towards Vcc (case B in the image to the right) or down towards Vss (A in the image), depending on the orientation of the magnet. The magnet approaches the sensor as the pedal is moved down. The firmware will autodetect the direction of "pedal down" by determining the middle of the measured range. If it is higher than ½ Vcc, a rising voltage probably means the pedal is pushed down (case B). If it is lower, a pedal down leads to a lower voltage (A).
The stomp problem
The automatic range detection as described above turned out to be a bit too simple, leading to a positive feedback loop (and in feedback loops, positive is rarely a good thing): As explained above, the software automatically adapts the output range to fully map onto the range of received input values. Whenever the drummer stomps a bit too hard on the pedal, the controller receives an extreme input value. The output range is automatically adapted, which pushes the "fully closed" position further downwards. But that means that from that point onwards you would have to push extra hard on the pedal to get the hi-hat to close. Pushing hard on the pedal however would mean that the range would be adapted, etc, etc.
This problem was solved by accepting the lower 1/6th of the range as "lowest position" (writing a 0 to the pot meter). This means that when the drummer stomps a bit hard and the range is expanded downwards, there are still enough positions that are regarded as "fully closed" without having to push too hard on the pedal. This effectively breaks the feedback loop.
Comments? Questions?
{{#set: |Article has average rating={{#averagerating:}} }} {{#showcommentform:}}
{{#ask: Belongs to article::Digital FD-8 pedalModification date::+
 | ?Has comment person
 | ?Has comment date
 | ?Has comment text
 | ?Has comment rating
 | ?Belongs to comment
 | ?Comment was deleted#true,false
 | ?Has comment editor
 | ?Modification date
 | ?Has attached article
 | format=template
 | template=CommentResult
 | sort=Has comment date
 | order=asc
 | link=none
 | limit=100
}}
